Making a Simple Parcel Map
How to Make a Simple Parcel Map with Google Earth ProIntroduction
The purpose of this tutorial is to help you make your own parcel map using parcel outlines from the Scott County PVA website and Google Earth Pro. There three major parts to this process:
- Download parcel outlines from the Scott County PVA website.
- Open and style the parcel outlines in Google Earth Pro.
- Setup and save the map of parcel outlines in Google Earth Pro as an image.
Each of these steps requires some intermediate steps so we’ll break everything down into smaller pieces.
##What you’ll need
- Google Earth Pro
- Download
- You may need to give Google Earth Pro an email address and a key. You should be able to just use your email address and the key
GEPFREE
- Some idea of where your properties of interest are. It might be good to know one (1) of the following things:
- Address or street name
- GIS Map ID number
- Name of the parcel owner
Getting the parcel boundaries
- Go to the Scott County PVA site
- URL:
http://qpublic5.qpublic.net/ky_isearch.php?county=ky_scott
- URL:
- The site gives you several options for searching for a parcel. Select the option that you have information for.
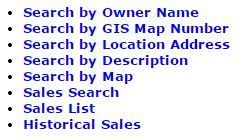
- Tip: If you know where your parcel is, but don’t have much information about it,
Search by Mapis probably your best bet.
- Tip: If you know where your parcel is, but don’t have much information about it,
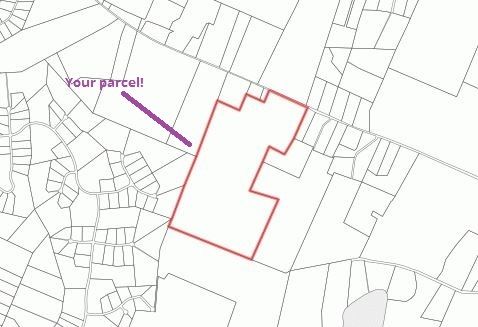
- After submitting your search, you will be presented with a list of results. Locate your the row for your parcel of interest. In the last column, GIS Map, with a link,
Map It. Click that link.

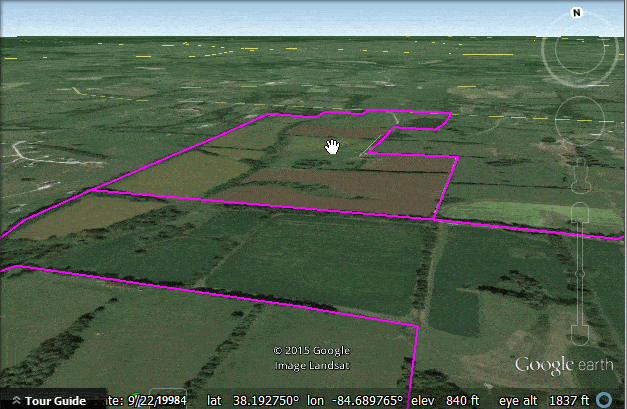
- A map should be directed to a map with your parcel highlighted with a pinkish red outline. Make sure it’s the parcel you want!
- In the right pane on your screen is the Parcel Information Table. This gives you a little more information about the parcel. You have the option View as: and several map providers. Click
Google Earth.
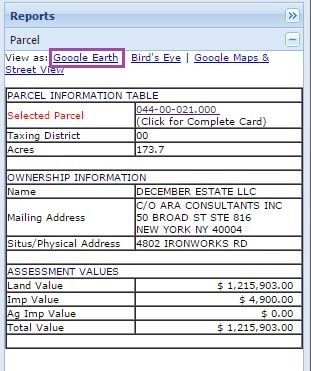
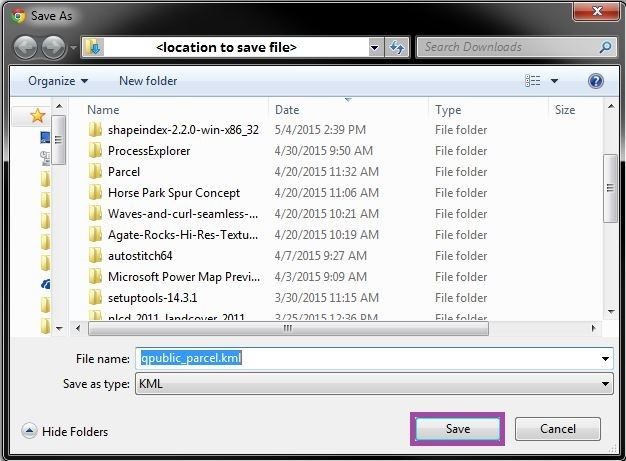
- You’ll be prompted to save a file called
qpublic_parcel.kml. This is a file containing the boundary for your parcel! Feel free to rename it something meaningful to you and save it to a location where you’ll remember to find it.
Congratulations! You’ve successfully found a parcel on the Scott County PVA website and saved a KML file of its boundaries. Unfortunately you can only select one parcel at a time so if you want to get more parcel boundaries, you’ll need to repeat the step for this section.
Opening Parcels in Google Earth Pro
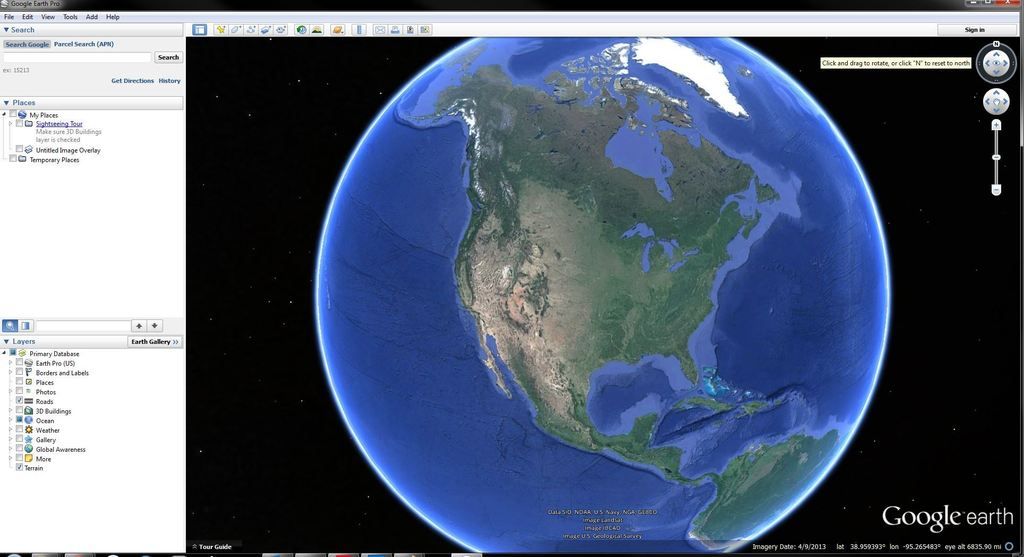
- Open Google Earth Pro. If a tip window opens up, just close it. The initial view will be a very zoomed-out globe. That’s fine!
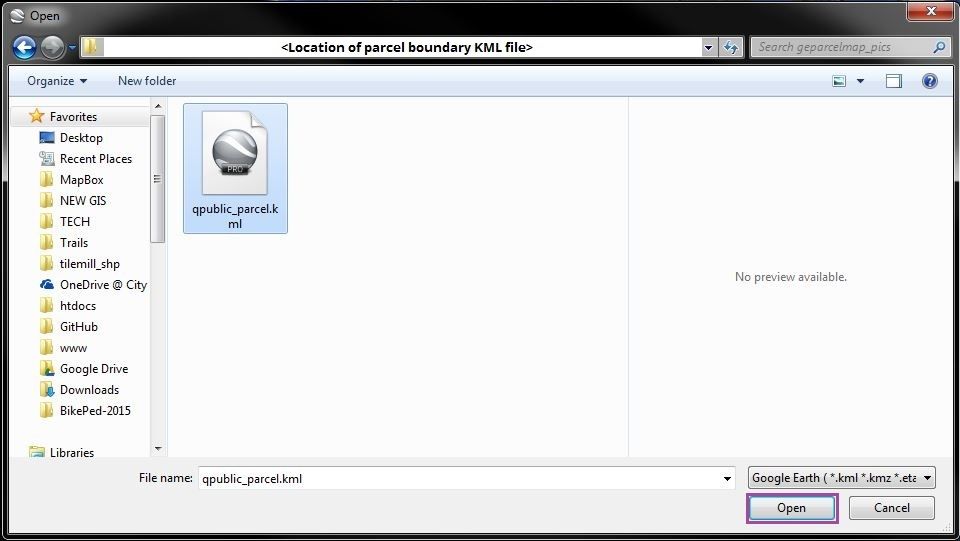
- In the top-left corner, navigate to File>Open…. Click.

- A window will pop up. If it’s not already there, navigate to the folder containing the KML file of the parcel boundary you want to add to the map. Select that file and click Open.
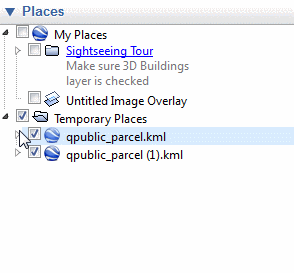
- The map will zoom to the location of your parcel. On the left side of your screen you should see a few panes. Look in the one called Places. You should see that your parcel has been added under
Temporary Places.
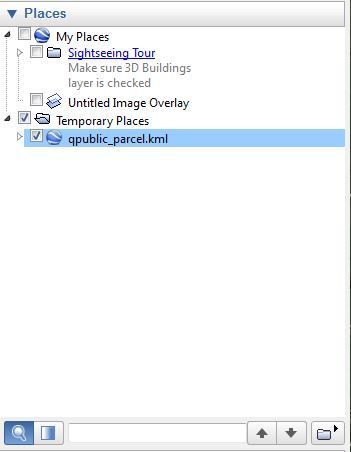
You’ve now added one KML parcel boundary that you downloaded from the Scott County PVA. To add more, repeat steps 1-3. The rest of the examples will assume your map shows two (2) parcels.
Style the parcels
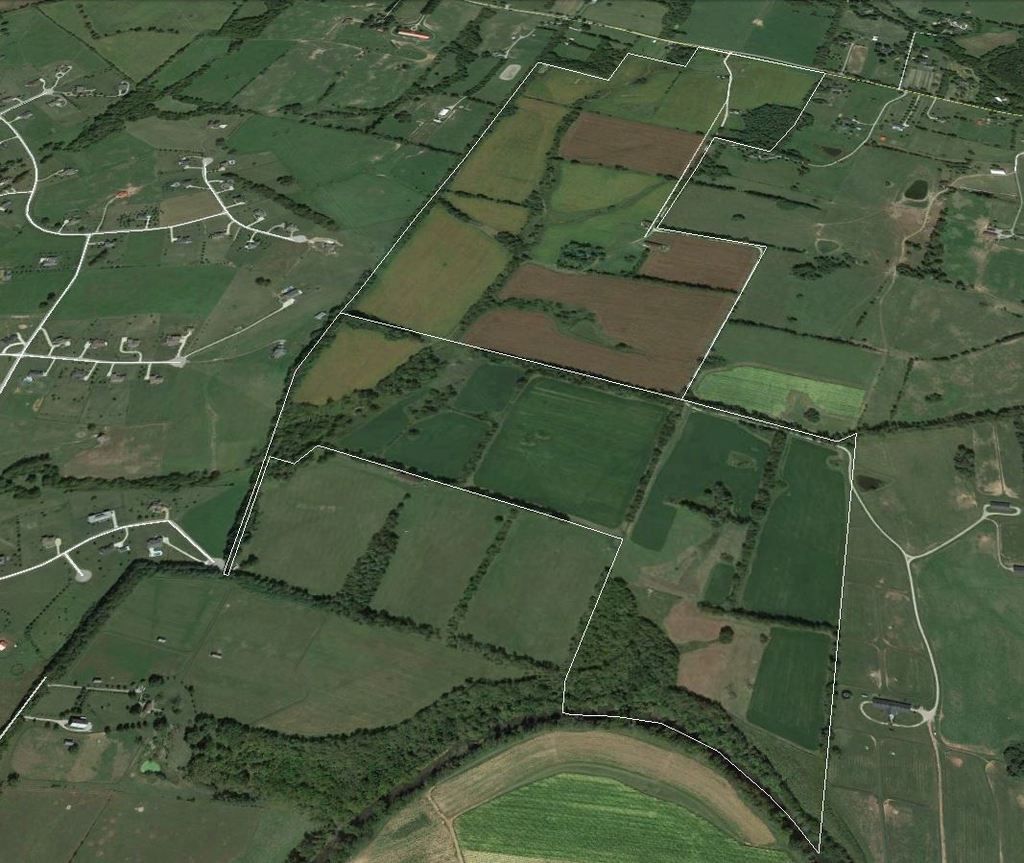
The parcels you’ve added to Google Earth Pro will come with a default style. Most likely this will be thin, white lines. Let’s change the line thickness and color.
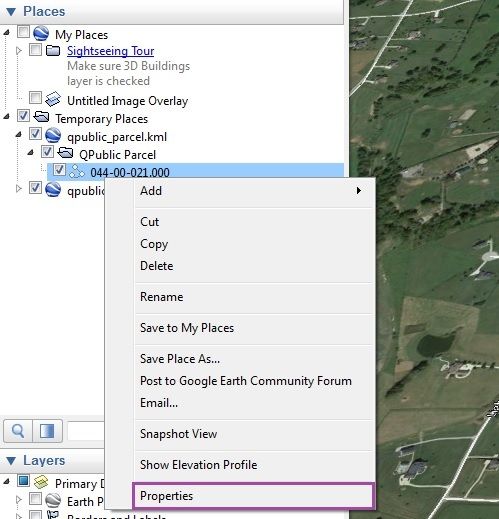
- In the Places pane (left), find the parcel you want to style. There will likely be a little right-pointing arrow next to the name of the file. Click it. This will reveal a folder called
QPublic Parcel. There should be another little right-pointing arrow. Click that. You should then see a string of numbers and dashes. That’s the parcel’s unique identification number (GIS ID Number). You’ve arrived!
- Right-click on that GIS ID Number and navigate to Properties. Click.
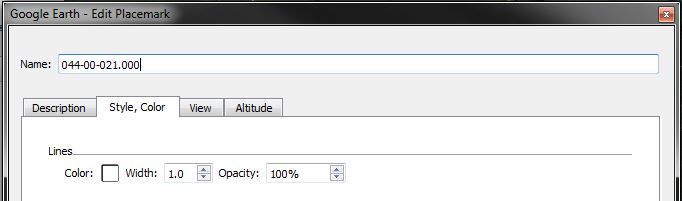
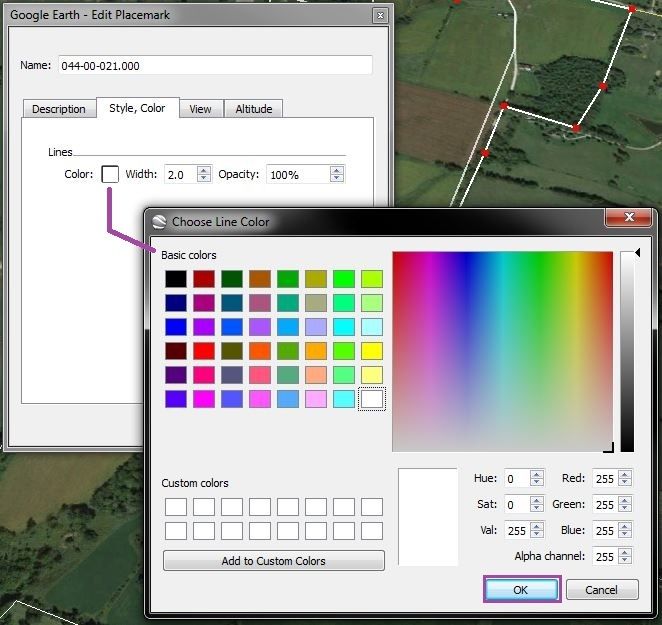
- The Edit Placemark window will pop up. You should see four (4) tabs. Click the Style, Color tab. You should see three style parameters you can change: Color, Width, and Opacity.
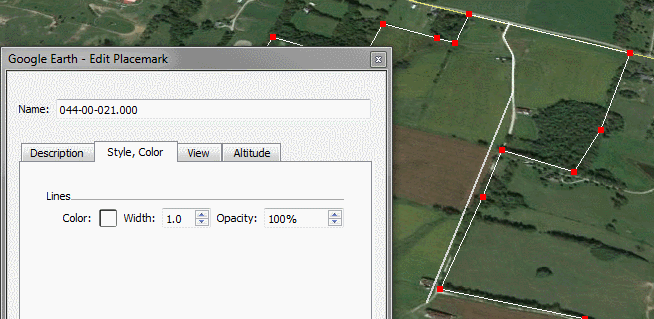
- Tip: Try to avoid clicking on the map when the Edit Placemark window is open. If you do you might accidentally edit the shape of the boundary. If this happens, just click Cancel and go back to step 1.
- First, let’s change the line width. You change it by using the up and down arrows to the right of the width value or your can just type in a value directly to the Width field. The width of your parcel’s line will update automatically so you can see how your changes will look right away
- Next, let’s change the color. To the right of the label, Color, is a little square, or patch, that reflects the current color of your line. Click it. This will bring up the Choose Line Color window. Select the color you’d like for your line and click OK.
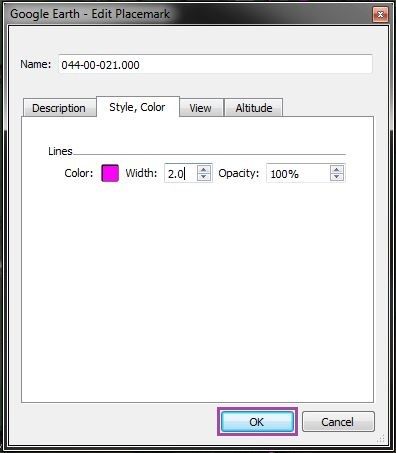
- Double-check that your parcel’s outline width and color show up well against the aerial imagery of Google Earth Pro. If you’re pleased, click OK.
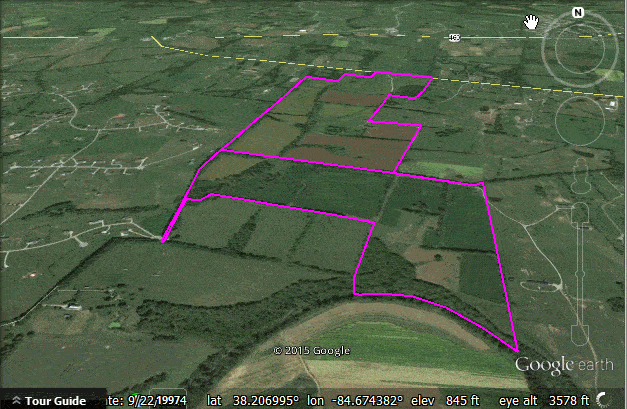
You should now have one parcel that you’ve styled yourself. If you have other parcels that you’d like to style, just repeat this section.
Orienting the map
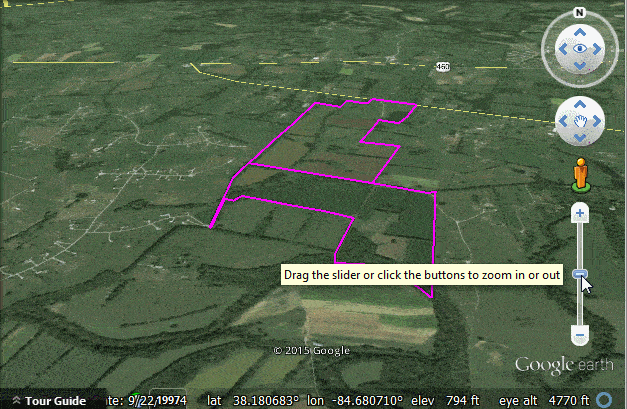
Google Earth Pro is different from some other map viewers in that it gives you a lot of flexibility in terms of your map’s orientation. Viewing angle, zoom level, and the direction of north are all things you can adjust yourself. Changing any one of these can affect the other options so you might need to mess around a little bit to get the right north direction, zoom, and view angle.
Adjusting the direction of north.
In the top-right corner of your map is a little compass rose. You can click and drag the little N tag around the compass rose to change where north is on your map.
Adjusting the zoom
If you’ve ever used Google Maps, this functions in a similar way. You can use your scroll wheel or, on the right of your screen, use the zoom-controller to slide up and down.
Adjusting the view angle
Unlike Google Maps or other web-base maps you may have seen, Google Earth allows you to view your map at angles other than 90 degrees (looking straight down). To adjust this, hold your Shift key and then click, hold and drag on your mouse to adjust the angle until you like it. Additionally, if you have a scrollwheel on your mouse, you can click, hold, and drag with it to change the view angle.
Set up document for printing
When you’re ready to export map to an image, you have a few options to customize the look and layout of your map. You can add/edit map elements like title and text boxes, and adjust the resolution of your map. We’ll look at editing map elements and resolution separately, but to start customizing either, you’ll need to bring up those options in Google Earth Pro.
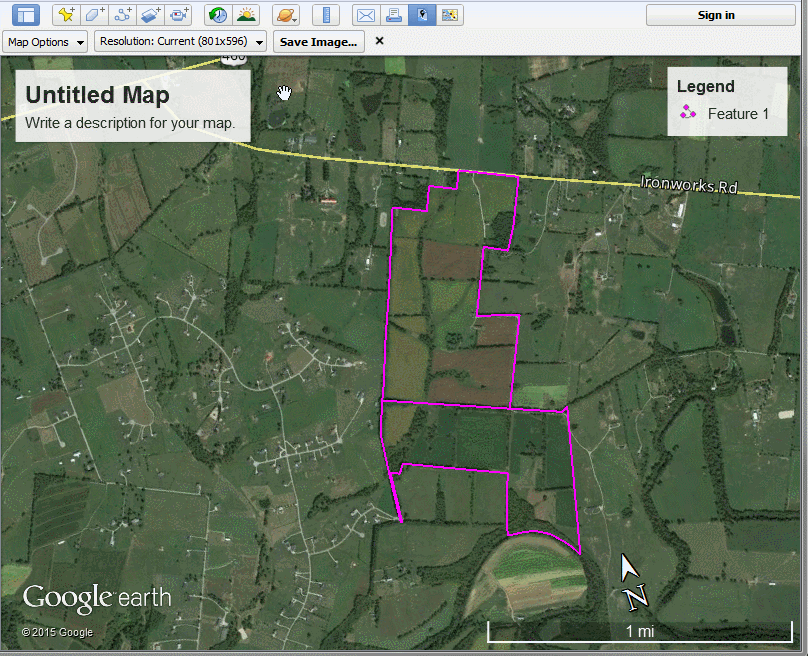
Along the top of your map is a tool bar with several buttons. Click the Save Image button.

Map elements
Clicking Save Image will automatically add some default elements to your map. This includes the Title and Description (1), Legend (2), Scale (3), and Compass (4) elements.
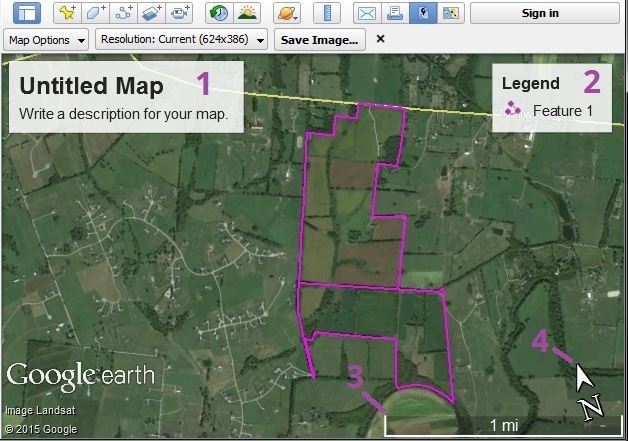
All of these elements, as well as a general HTML area, can be toggled on and off from the Map Options menu.
Additionally, all of these elements and the Google Earth logo can be repositioned on the map by clicking and dragging them.
Finally, you can give your map a custom title and description by clicking on the Title and Description element.
Adjust Resolution
You can adjust the size and aspect ratio of the map image in a couple of ways.
- Use the preset resolutions from the Resolution menu.
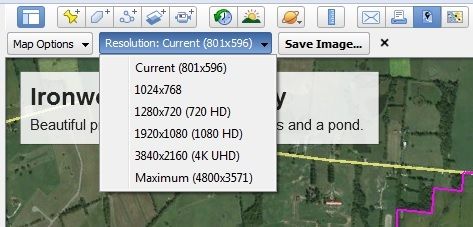
- Resize Google Earth Pro manually and use the Current setting under the Resolution menu.
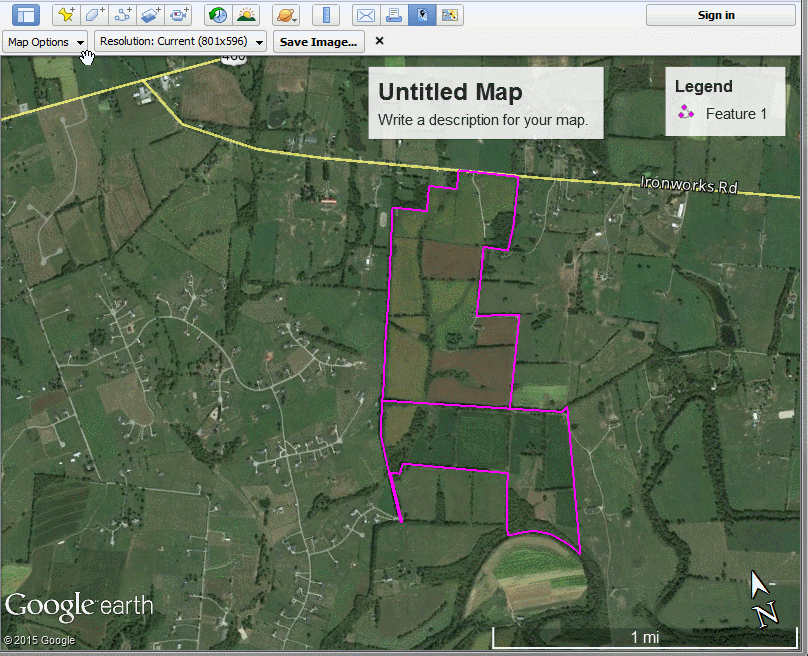
Saving a Map as an Image
Once you’re pleased with your map, it’s time to save it as an image. To do this, click Save Image. Make sure to save your map image to a folder you’ll remember.
Conclusion
Way to go! If you’ve made it to this point, you’ve successfully downloaded parcel boundaries from the Scott County PVA website, added those lines to Google Earth Pro, and saved your map as an image.
If you have any questions, comments, or concerns, send those to rcooper@gscplanning.com.