Converting a shapefile into a geodatabase feature class
Three methods using ArcGISTable of Contents
Introduction
This little tutorial will walk you through how to convert a shapefile into a geodatabase feature class using ArcGIS. This will be broken into two larger parts:
- Creating a geodatabase
- Converting a shapefile into a feature class
By the end, you should be able to work with your layer as a feature class in a geodatabase.
Creating a geodatabase
When using a geodatabase it’s important to keep in mind that the geodatabase itself is just a container for data. While it has special functionality for spatial data, it serves the same purpose as any other file folder on your computer. In fact, if you look at a geodatabase outside of ArcCatalog or ArcMap it will just look like a folder on your computer.
The data that are stored in a geodatabase are called feature classes. These are similar to shapefiles. What you’ll really be doing through this process is converting a shapefile to a feature class that resides in a geodatabase. But before you can do that conversion, you need a place, a geodatabase, for your feature class to be stored. In short, you need to create a geodatabase:
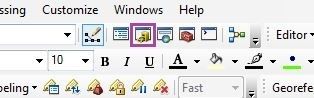
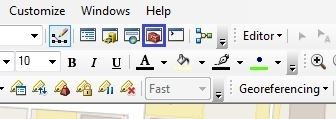
- In ArcMap, open up the ArcCatalog pane. You can access this from the toolbar:
- In the ArcCatalog pane, navigate to a folder where you want to store your geodatabase. In this example, I’ll be using
C:\temp, but you can use whichever folder you’d like.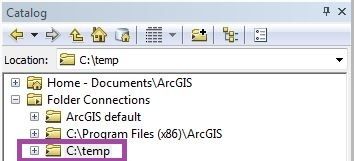
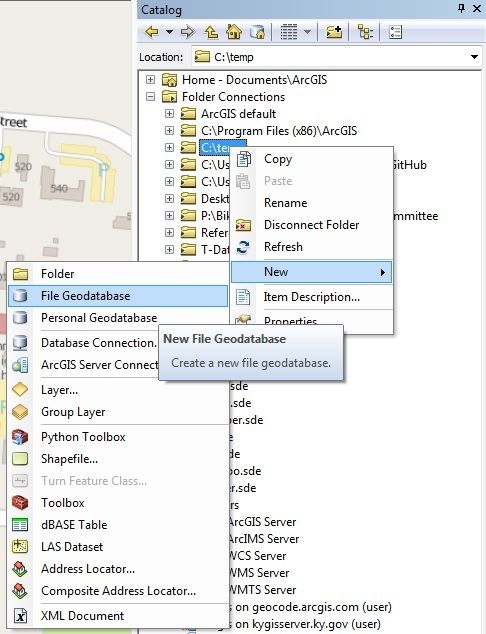
- Right-click on the folder where you want to store your geodatabase, navigate to New>File Geodatabase. Left-click File Geodatabase
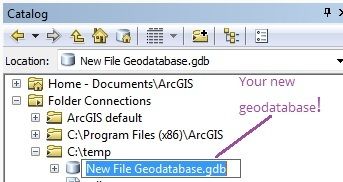
- You’ve created a new file geodatabase! ArcCatalog names it New File Geodatabase.gdb by default, but also gives you the option to rename it.
- Give your geodatabase a name appropriate for your project. I’ll be naming mine project.gdb. (You may need to right-click and navigate to Rename to change the geodatabase’s name)

Congratulations! You’ve successfully create a new file geodatabase. You’ll now be able to add feature classes, including those converted from existing shapefiles, to your geodatabase.
Converting a shapefile to a feature class
Let’s walk through how to convert a shapefile into a feature class for storage in the geodatabase you just made. There are a few ways to do this though it seems to work most reliably for me from the ArcMap Table Of Contents, but I’ll also outline how to get the same results from ArcCatalog and using the Feature Class to Feature Class tool, respectively.
via ArcMap Table of Contents
This assumes you have the layer you want to convert loaded into an ArcMap project
- Find your layer to convert in the Table of Contents. Right-click.
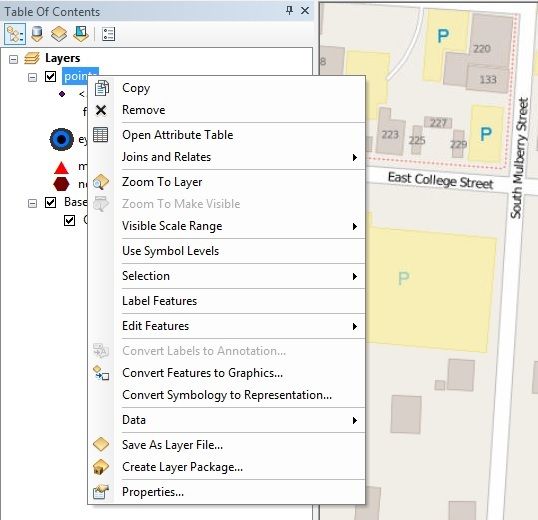
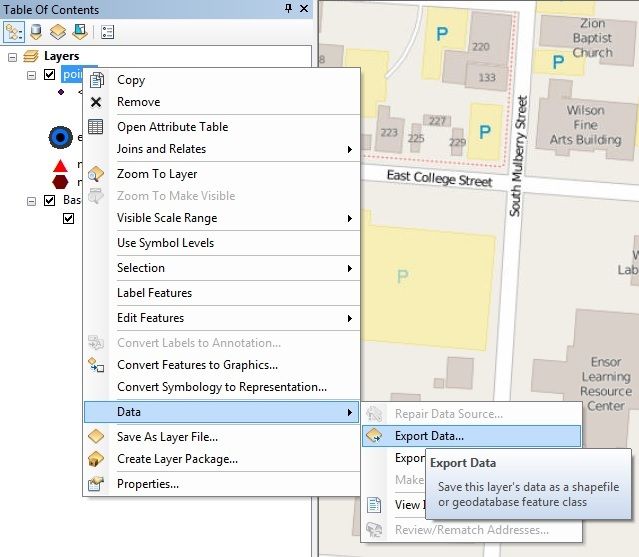
- Navigate to Data>Export Data. Left-click.
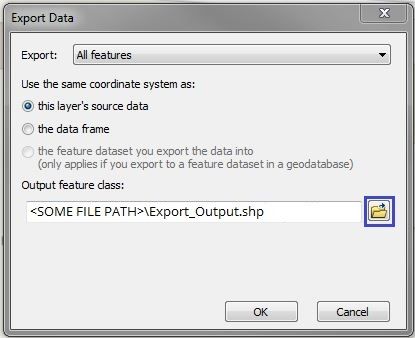
- The Export Data dialog box should open up. For the sake of the example we’ll leave the defaults as they are, but we need to tell Arc to export the shapefile as a feature class and into which geodatabase to place the result of the export. To start this process, left-click on the little folder button under Output feature class.
- This will bring up the Saving Data dialog box. At the bottom of the dialog box is an option field, Save as type. The default will likely be shapefile. You can change that by clicking the option menu (the one currently showing “Shapefile”) and selecting File and Personal Geodatabase feature class.

- If the Look in field matches the folder You should see a little cannister icon and the name of your geodatabase. If not, you’ll need to navigate to the folder where your geodatabase is. Once Look in is set to the folder your geodatabase is in, double-click your geodatabase.
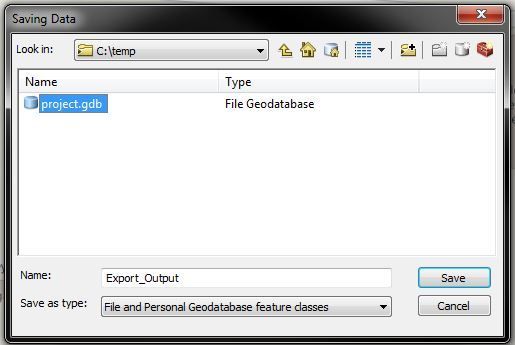
- Since you just created this geodatabase, there shouldn’t be any feature classes listed in it. Let’s change that. Look down at the Name field. It defaults to
Export_Output. I’ll be naming the feature classpoints, but name your file something appropriate for your project. Click “Save”.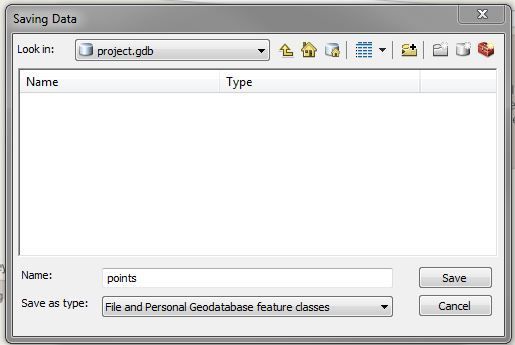
- The The Save as type dialog box will close. You should see the Export Data dialog box. Click “OK”.

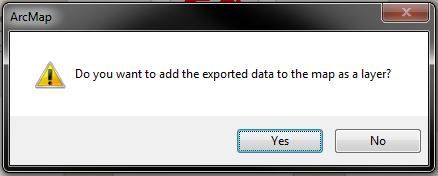
- A dialog box will appear asking if you want to add your newly converted feature class to you map. Click “Yes” to add your feature class to the map.
Your shapefile has successfully been converted to a geodatabase feature class. Way to go!
via ArcCatalog
(This assumes you’re accessing ArcCatalog from within ArcMap. However, the process is pretty much the same in the standalone version of ArcCatalog)
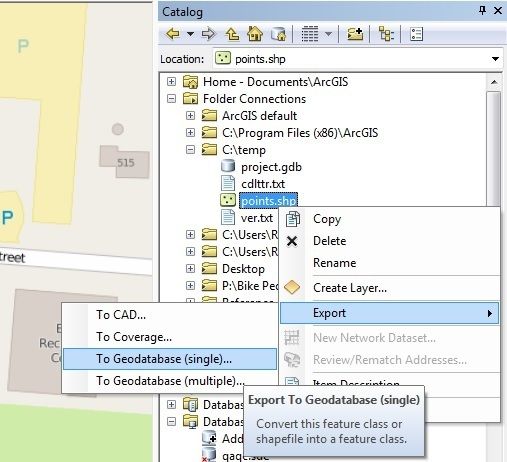
- In the Catalog pane, find the shapefile you’d like to convert into a geodatabase feature class. Right-click.
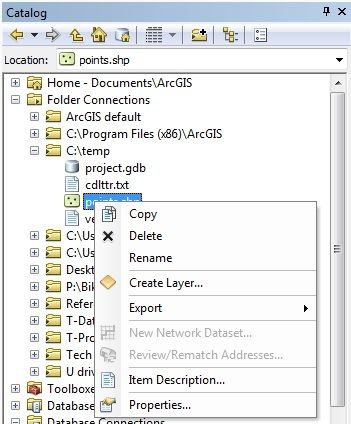
- Navigate to Export>To Geodatabase (single)…. Left-click.
- This opens the Feature Class to Feature Class tool. Input Features is already filled in with the name of the layer you want to convert.
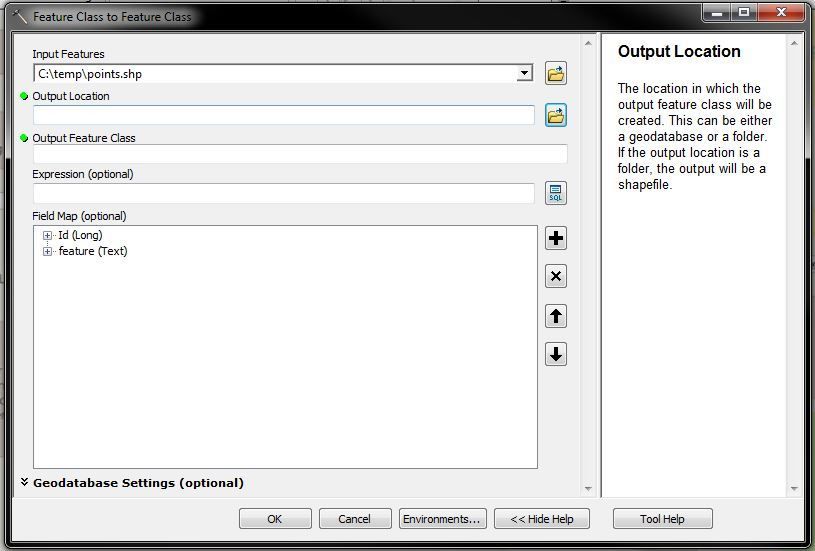
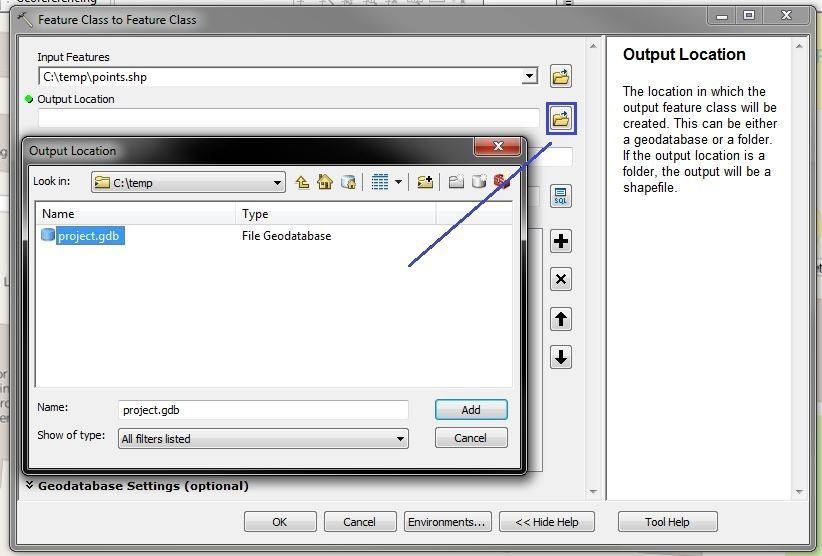
- Set Output Location by clicking the browse button at the field’s end. When you get to the folder that contains your geodatabase, left-click the geodatabase once and click the “Add” button.
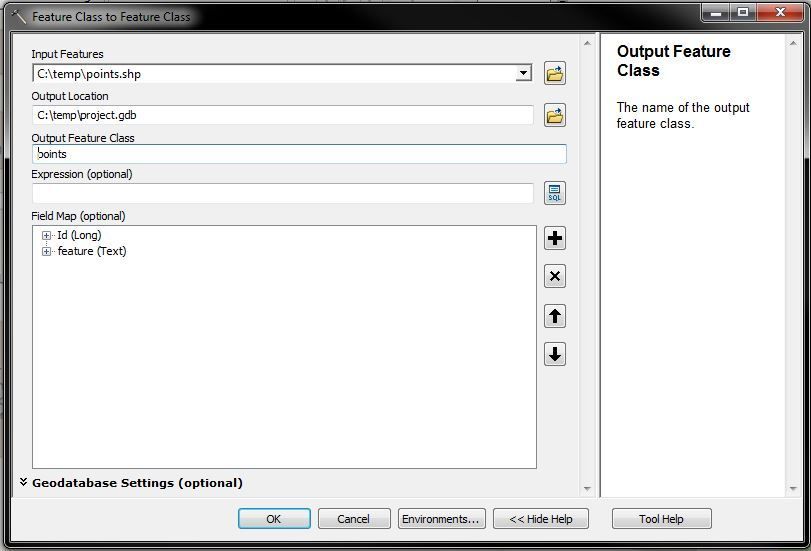
- Set Output Feature Class to the name you want for your converted feature class
The new feature class layer will be added to your map. Way to go!
via Feature Class to Feature Class tool
You can also access the Feature Class to Feature Class tool directly from within ArcMap.
- If you don’t have the ArcToolbox pane open, open it from your toolbar
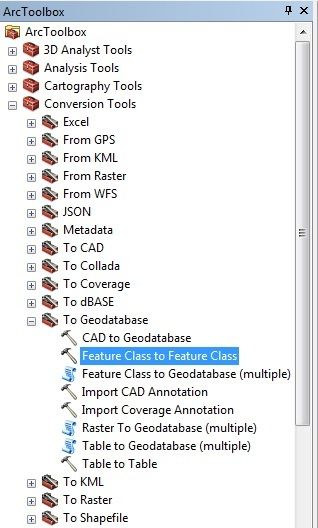
- In the ArcToolbox pane, navigate to Conversion Tools>To Geodatabase>Feature Class to Feature Class. Double-click.
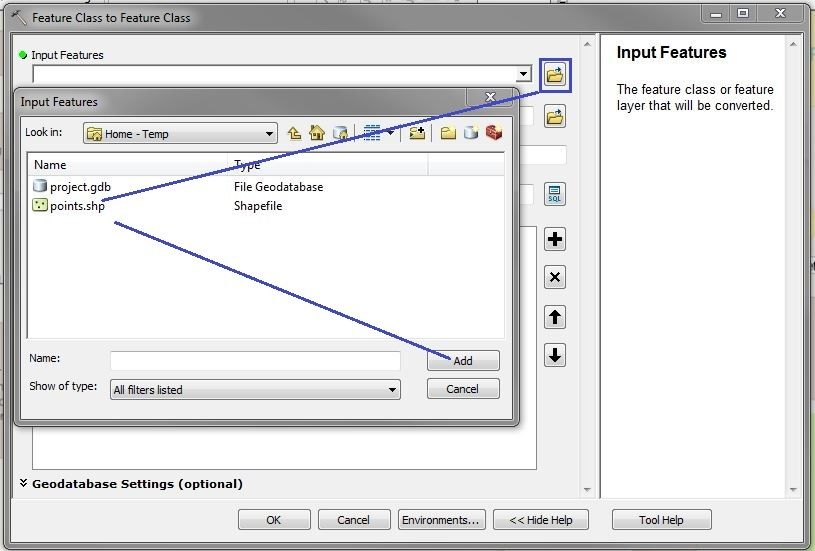
- This opens the Feature Class to Feature Class tool. For the Input Features field you need to identify the shapefile you want to convert. If your shapefile is in the Table Of Contents of your ArcMap project, you can select it by expanding the drop-down menu and left-clicking that layer. Otherwise, click the browse button at the field’s end. When you get to the folder that contains your shapefile, left-click the shapefile once and click the “Add” button.
- Set Output Location by clicking the browse button at the field’s end. When you get to the folder that contains your geodatabase, left-click the geodatabase once and click the “Add” button.
- Set Output Feature Class to the name you want for your converted feature class
The new feature class layer will be added to your map automatically. Congratulations on a successful conversion!