Exporting imagery to a TIFF
A way to export a subset of imagery for use in GIS and CAD programsIntroduction
Sometimes you’ll find that when you’re working with imagery or raster data sets, you only want to work with a small subset of the data. Or maybe you want to share the data from a particular area of interest. Rather than use or send the entire dataset, you might just want to use a particular subset of it. In this little tutorial we’ll walk through how to use export a subset of a larger imagery file to a TIFF using both ArcGIS and QGIS. In particular, this tutorial will focus on how to export to a TIFF that is compatible with multiple applications. At the end you will have a TIFF and and a world file (.tifw) to use yourself and share with others!
You may use your own imagery for this tutorial, but a sample dataset is available below. Make sure to download the data and unzip/extract it into a folder of your choice.
ArcGIS
First we’ll walk through how to export a subset of raster to a TIFF using ArcGIS. Before we start, you’ll need to open a blank MXD and ensure that you have made a folder connection to the imagery you’ll use for the tutorial. If you need to brush up on folder connections watch this short video on how to create a folder connection.
Alright, let’s start the process of exporting some data!
- Add imagery to your map. Navigate to your imagery file in the Catalog pane, left-click, and drag it into your map.
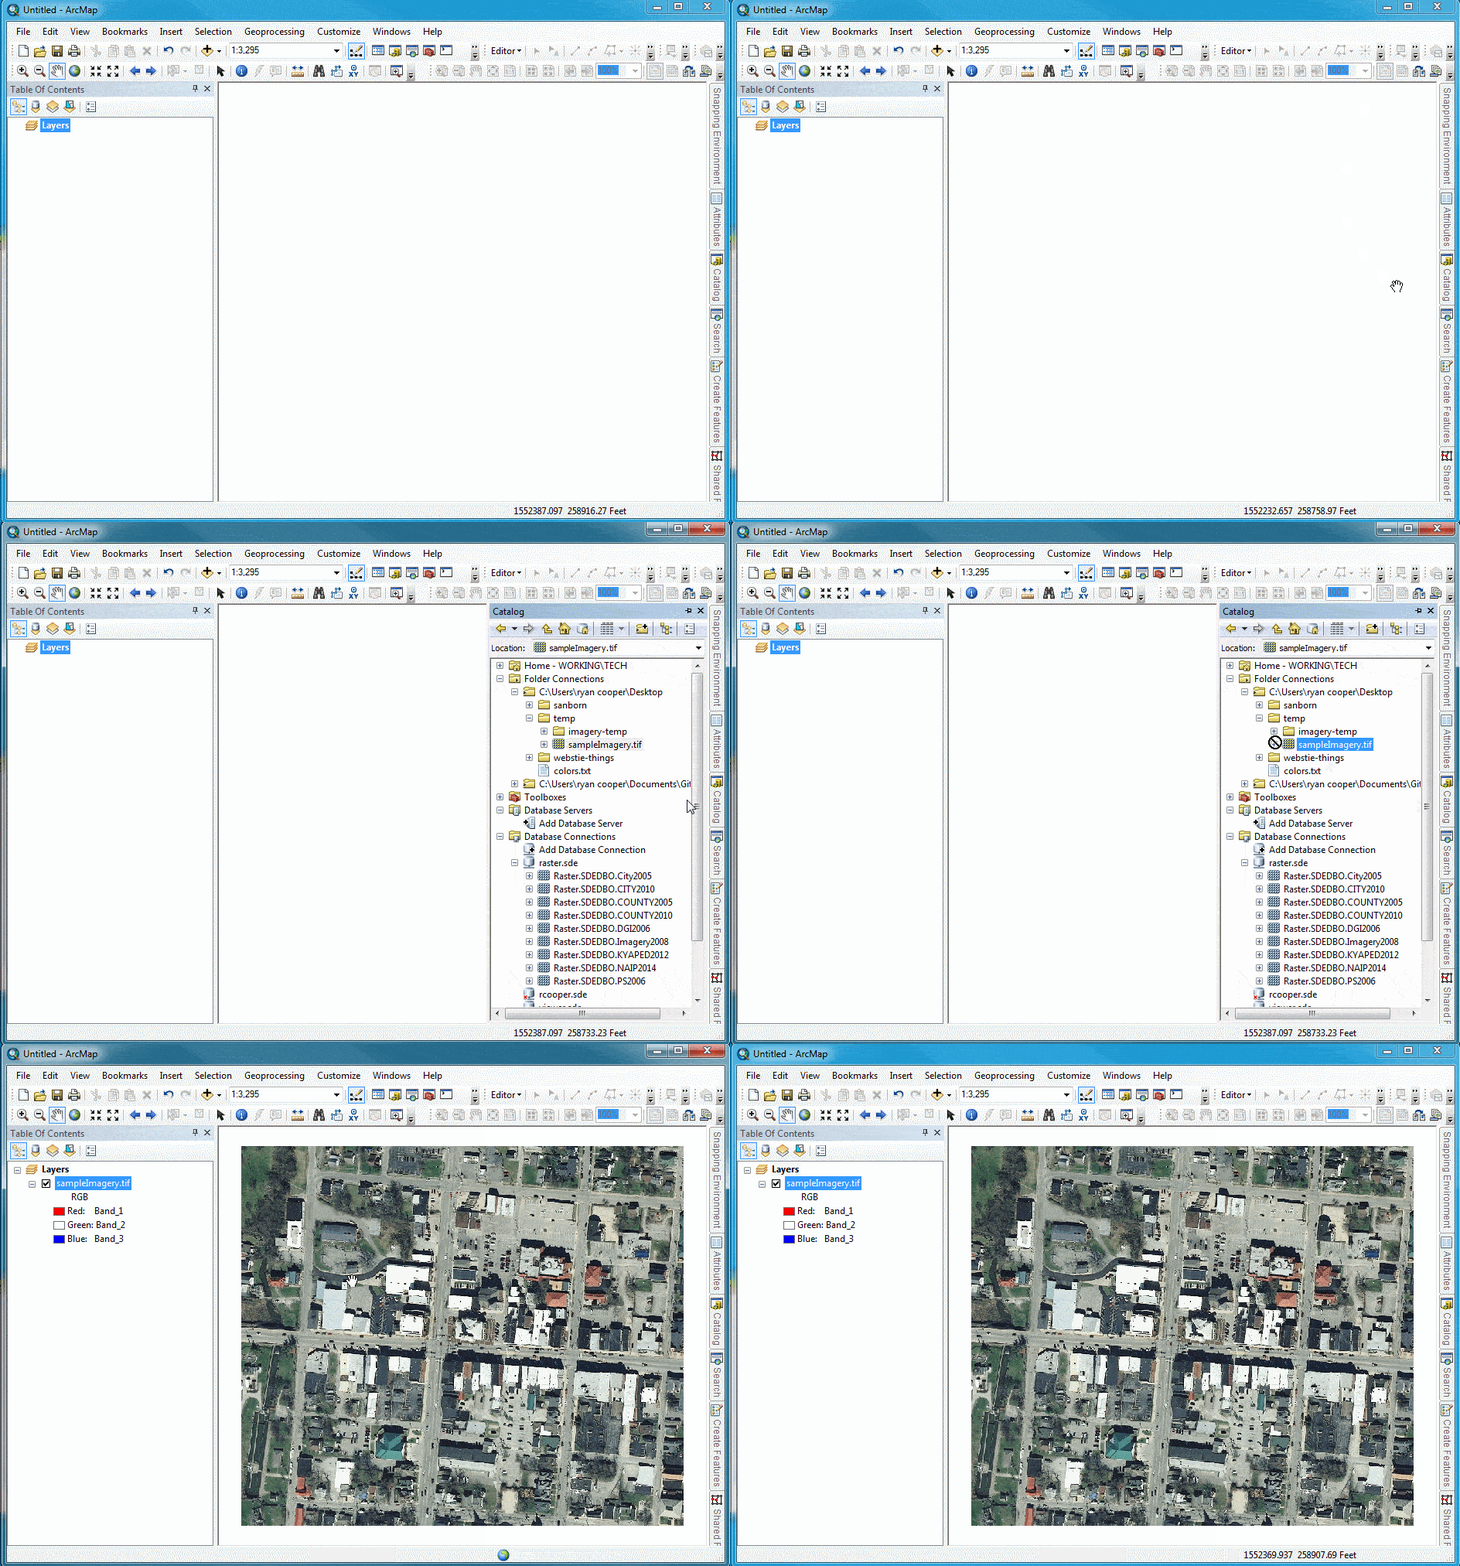
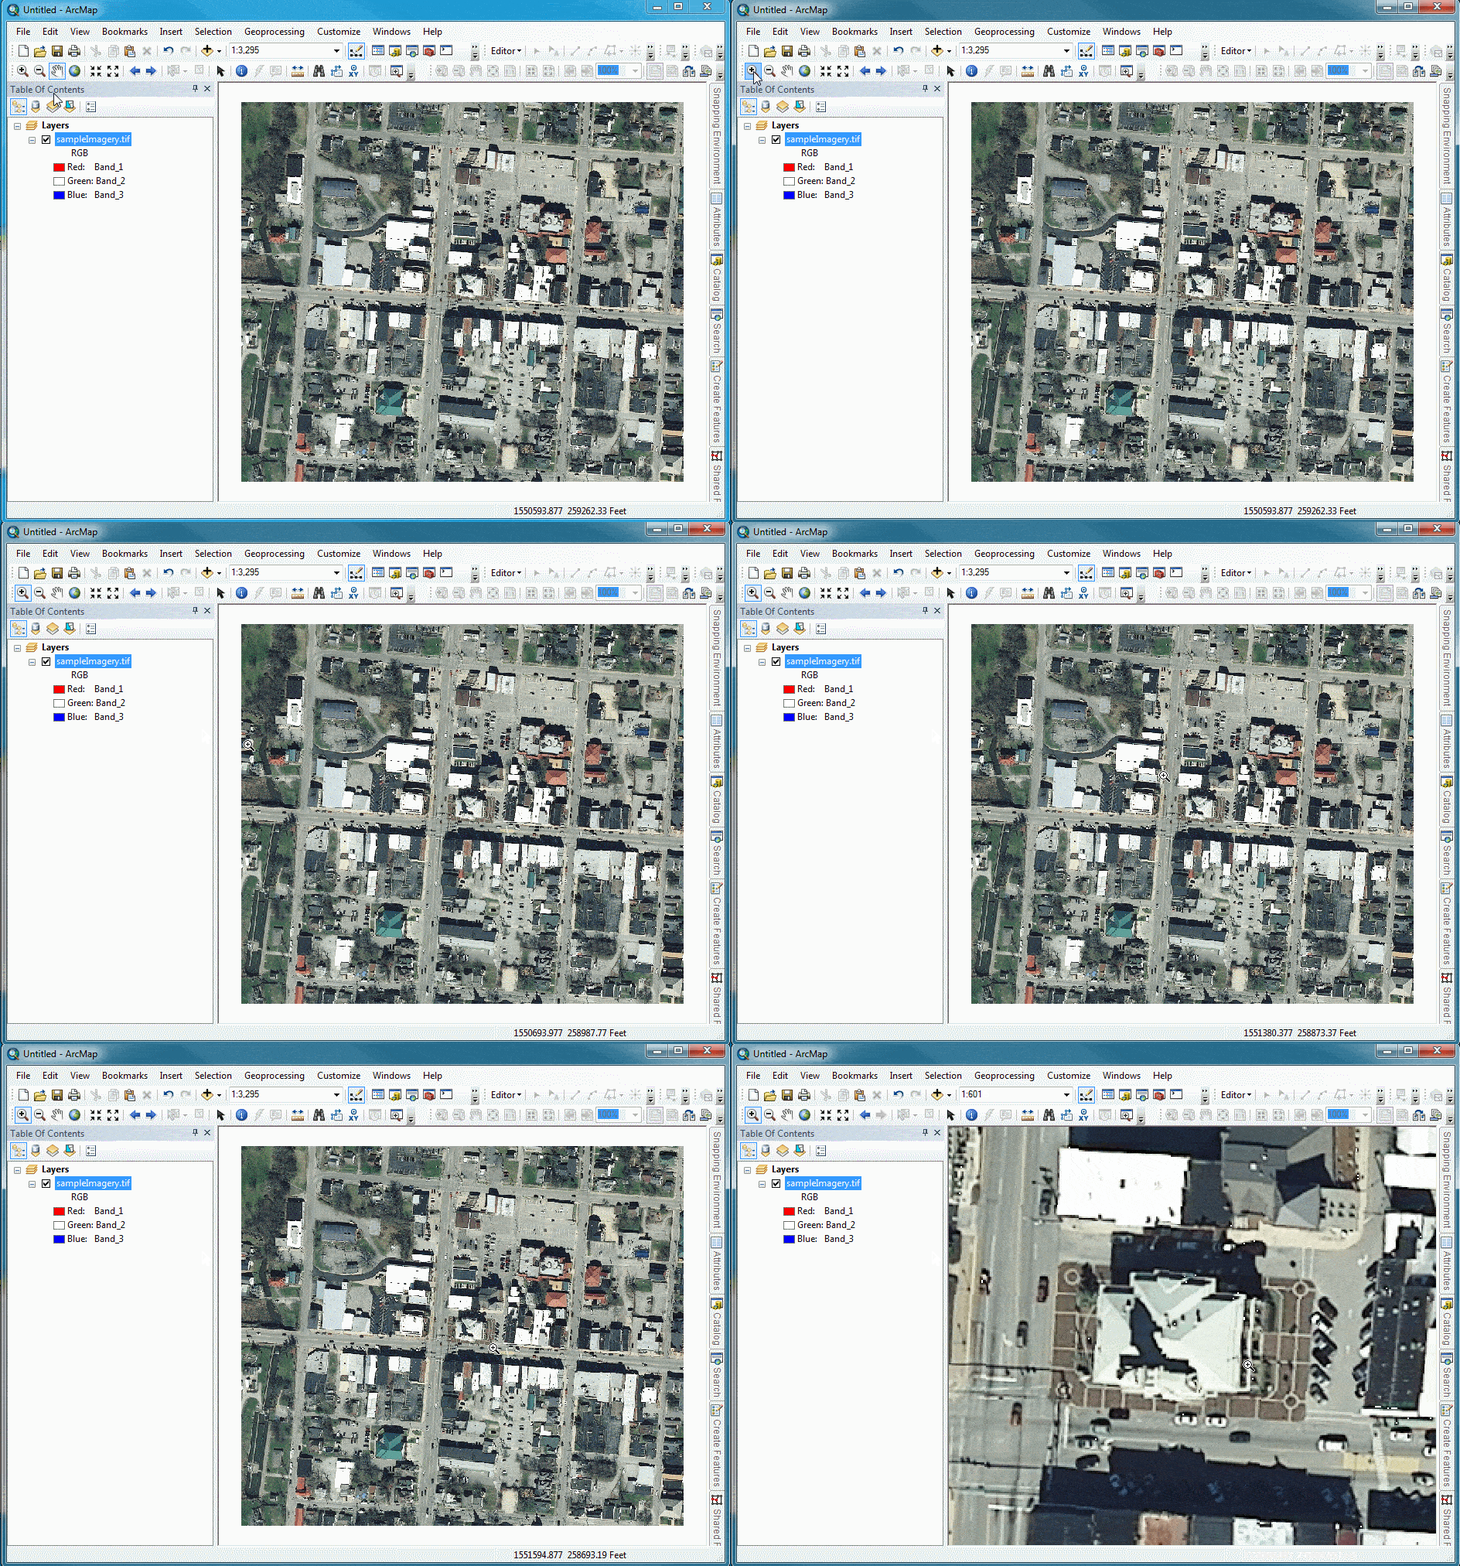
- Zoom in on your imagery layer to a particular area of interest. Here we’ll zoom in on the the Scott County Courthouse.
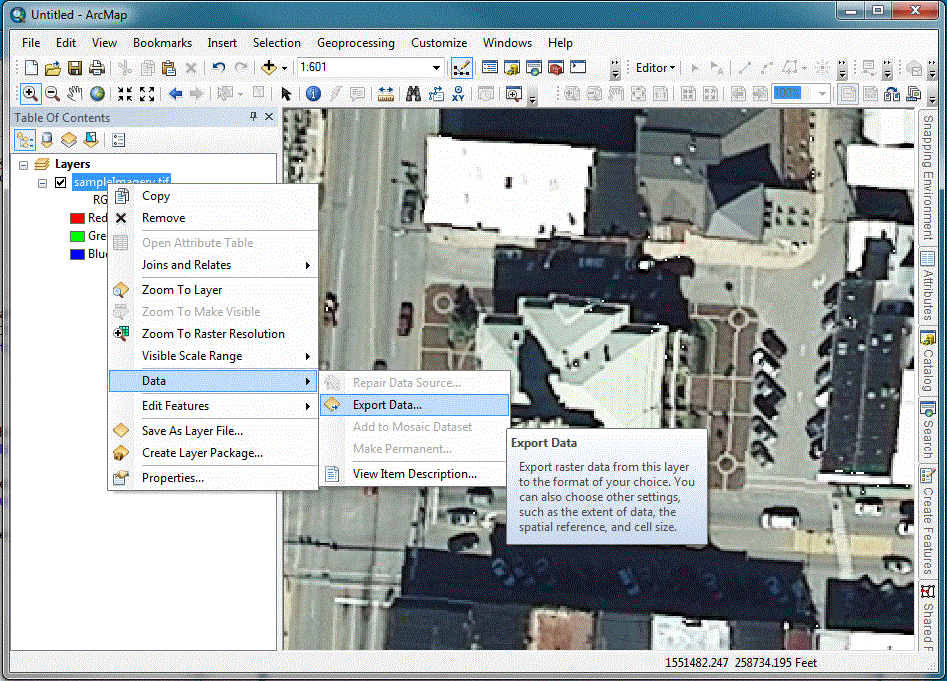
- In the Table of Contents pane, right click your imagery layer and navigate to Data>Export Data… and click.
- The Export Raster Data window should pop up. There are several settings to choose from. Here are the key settings to make your export easily accessible to those using some thing other than ArcGIS:
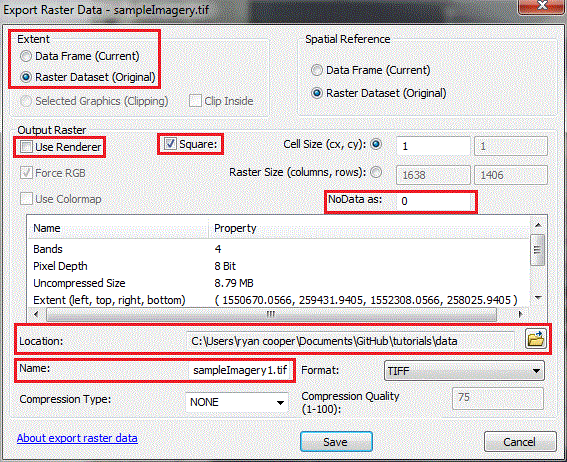
- Extent: Data Frame (Current)
- Output Raster:
- Use Renderer: unchecked
- Square: checked
- NoData as: 0
- Location: Click the folder button and navigate to the folder where you’d like to save your imagery
- Name: Give your imagery export a name!
- Click Save.
Wait for ArcGIS to complete the export. When it’s done, you may want to add the export to your map to examine it. If you’re please, congratulations! You’ve exported imagery!
QGIS
- Add imagery to your map. Navigate to your imagery file in the Browser pane, left-click, and drag it into your map.
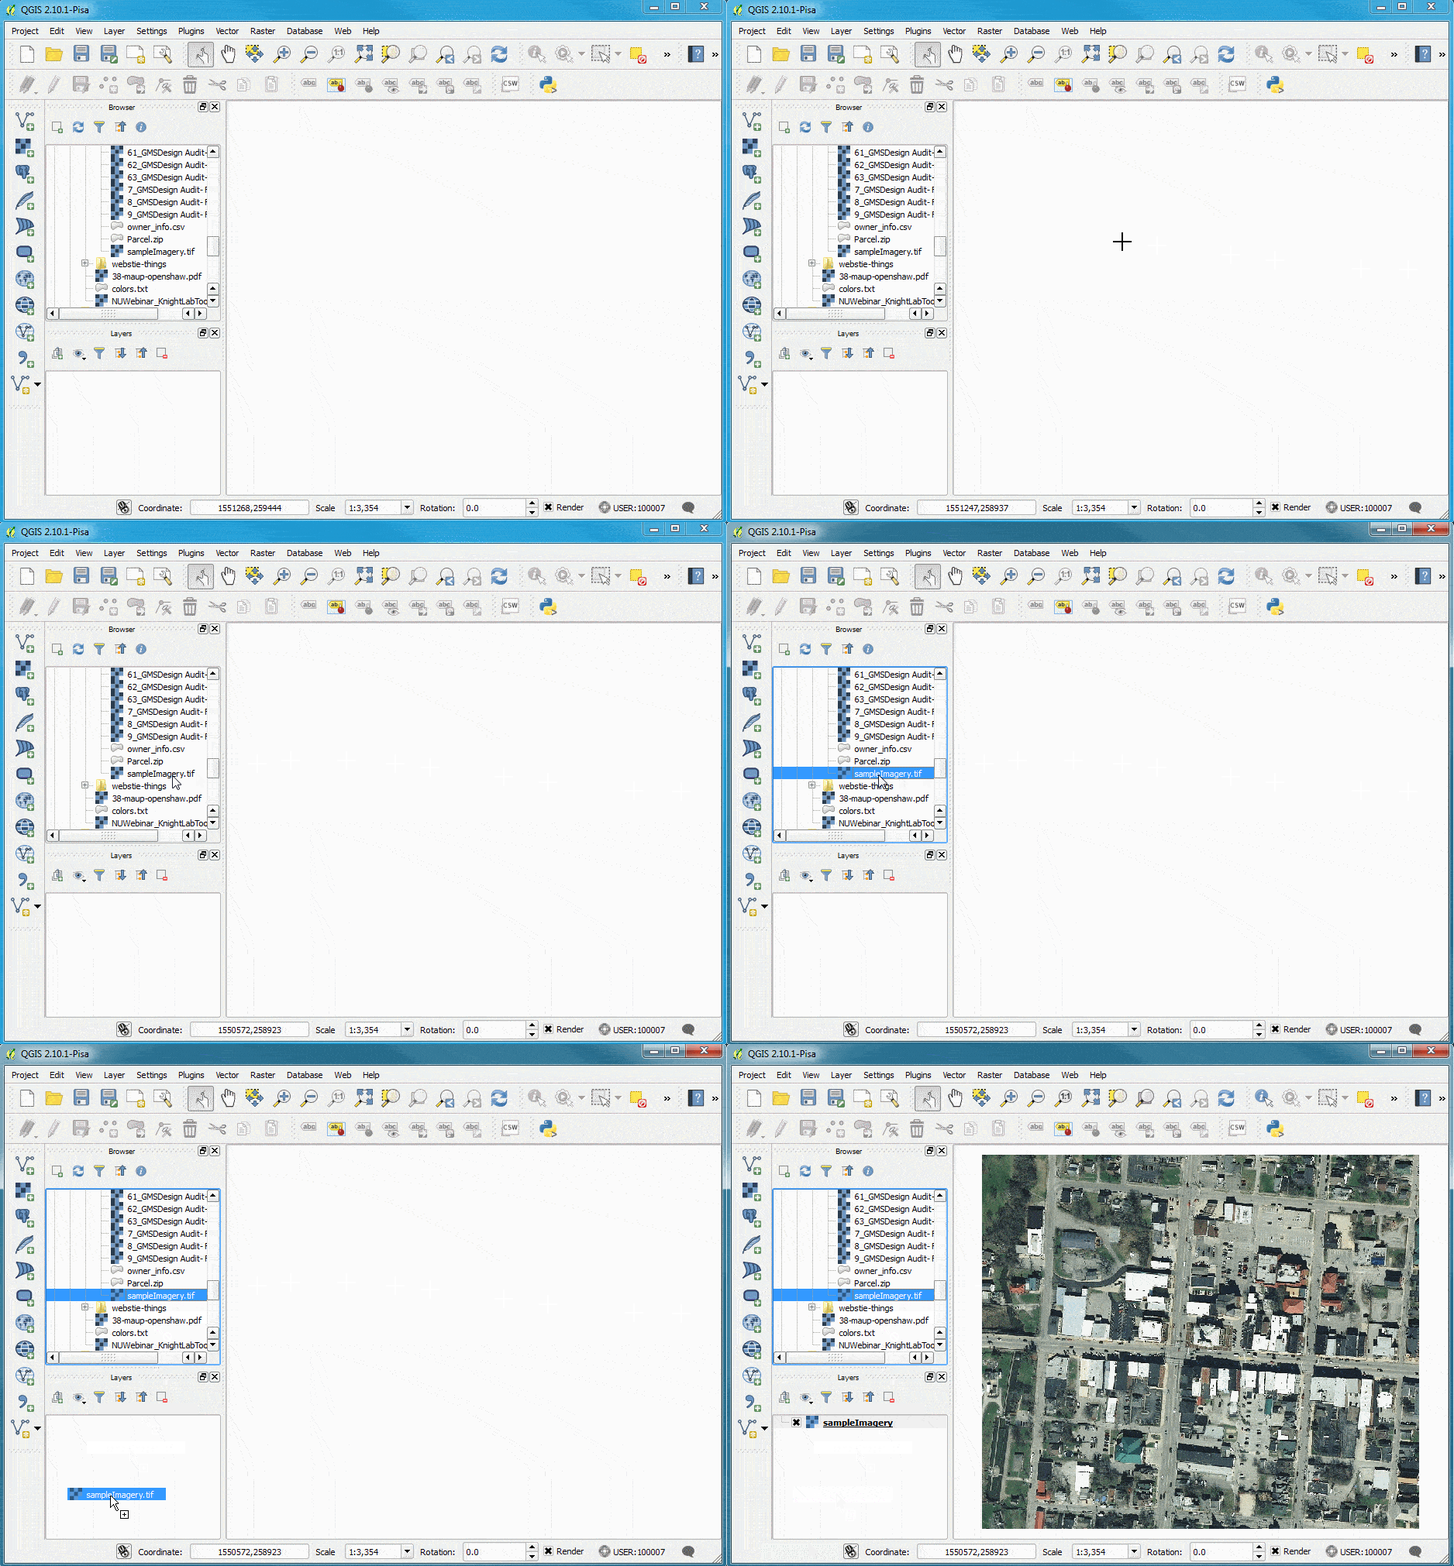
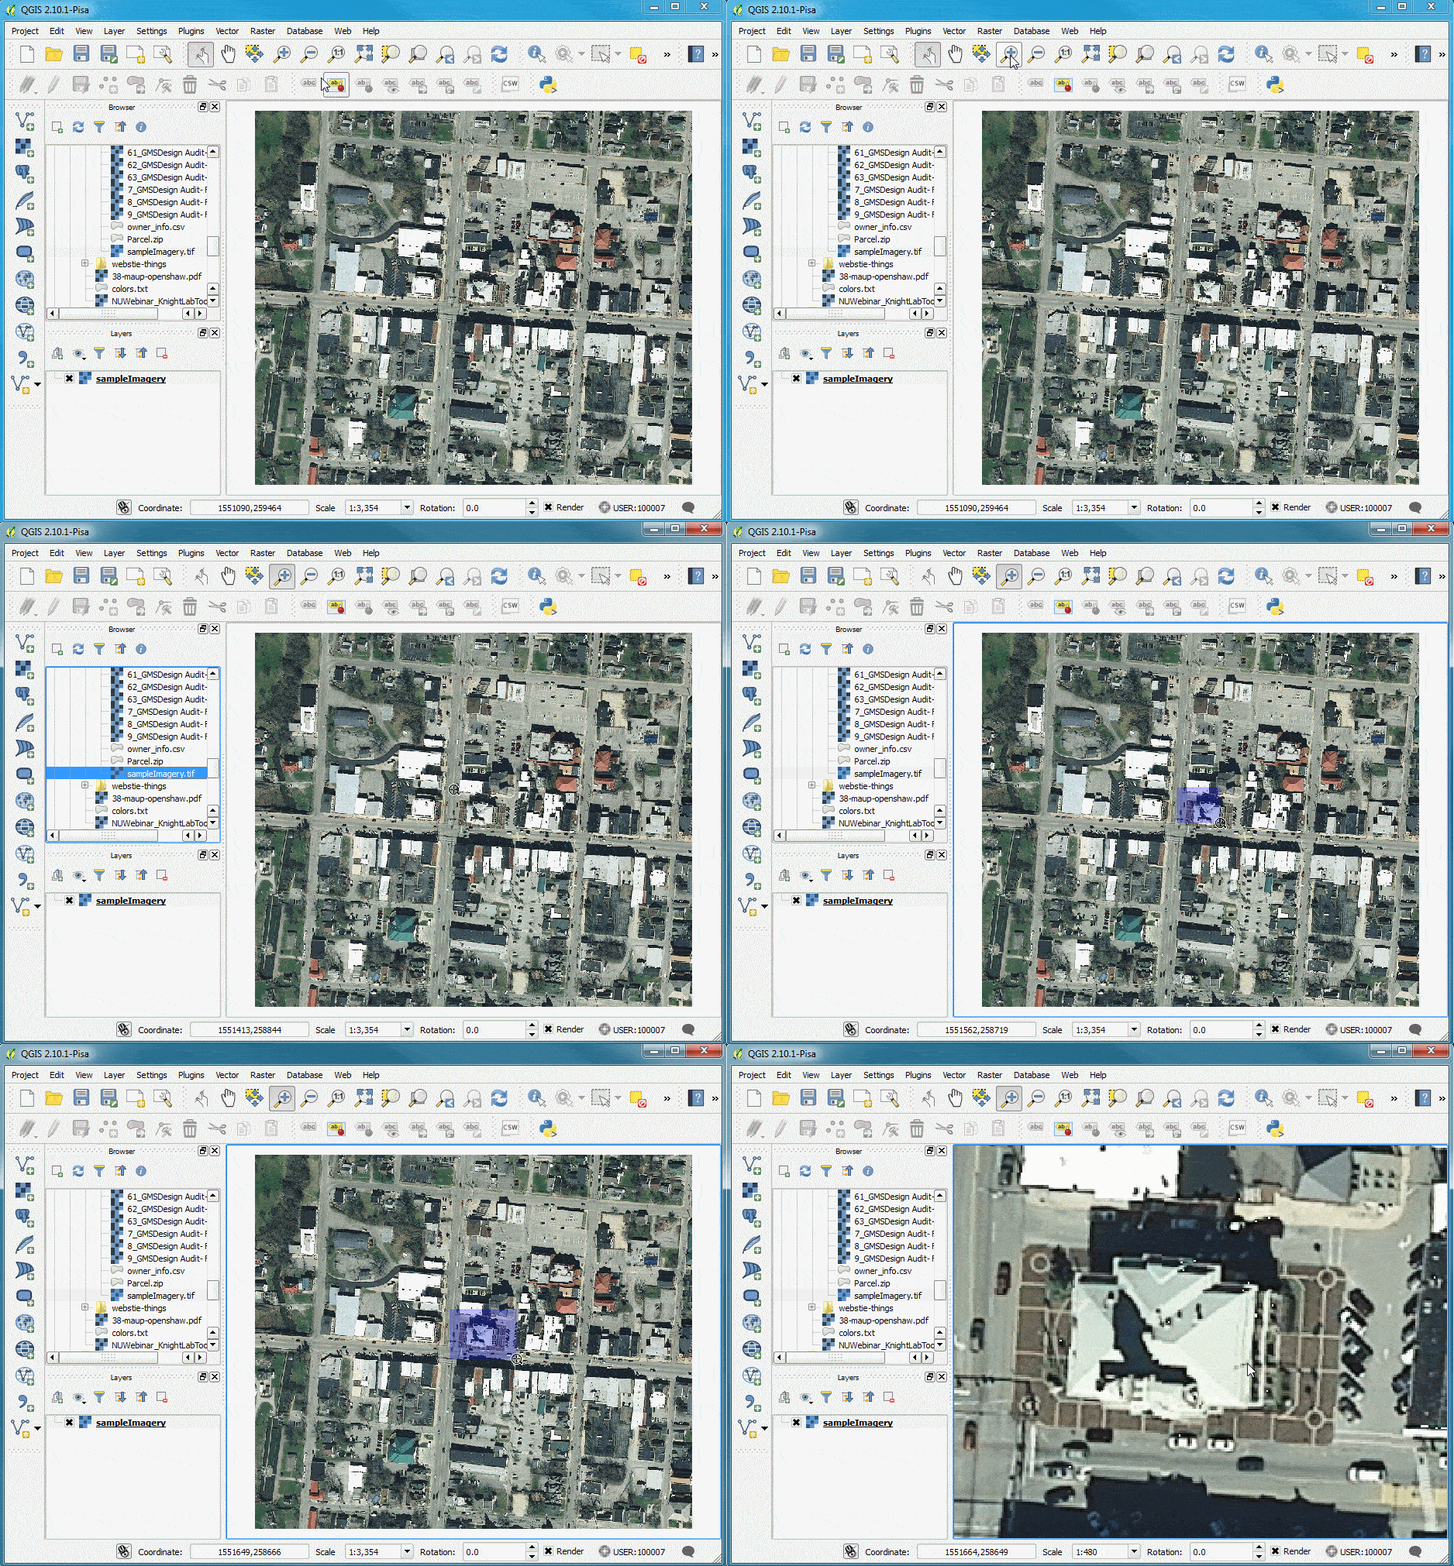
- Zoom in on your imagery layer to a particular area of interest. Here we’ll zoom in on the the Scott County Courthouse.
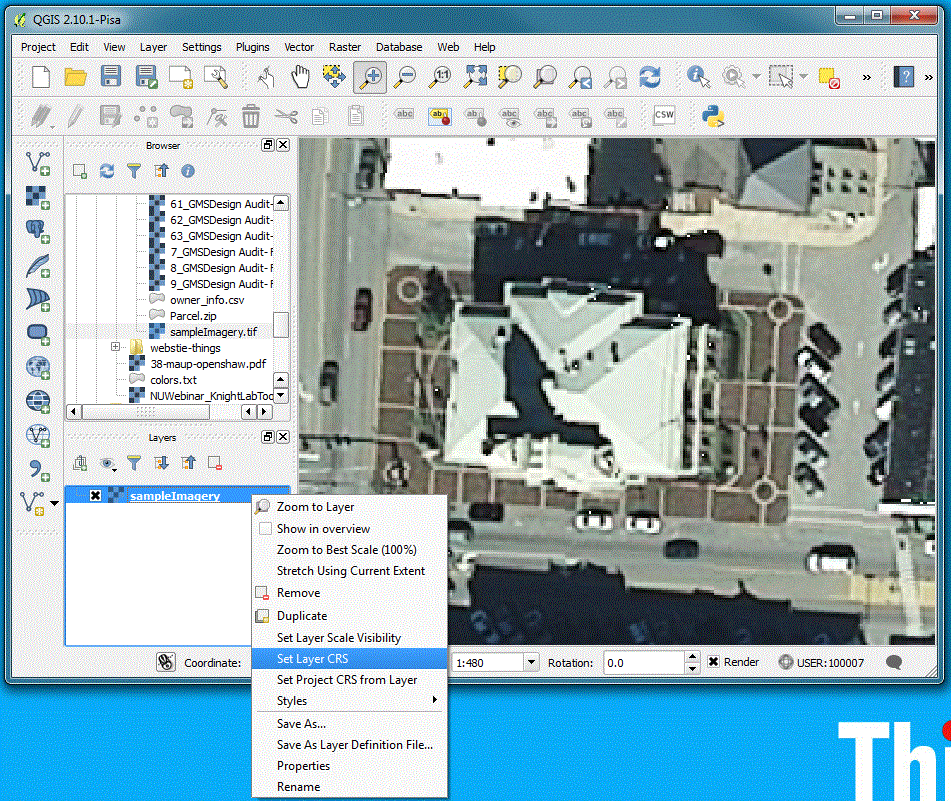
- Let’s make sure our coordinate reference system (CRS) for our imagery is correct. In the Layers pane, right click your imagery layer and navigate to Set Layer CRS. Click.
- The Coordinate Reference System Selector window will open. We want our CRS to be
NAD83 / UTM zone 16N EPSG:26916for this particular imagery. In the Filter field type26916. This is the unique identifier for our CRS. Select it below and click OK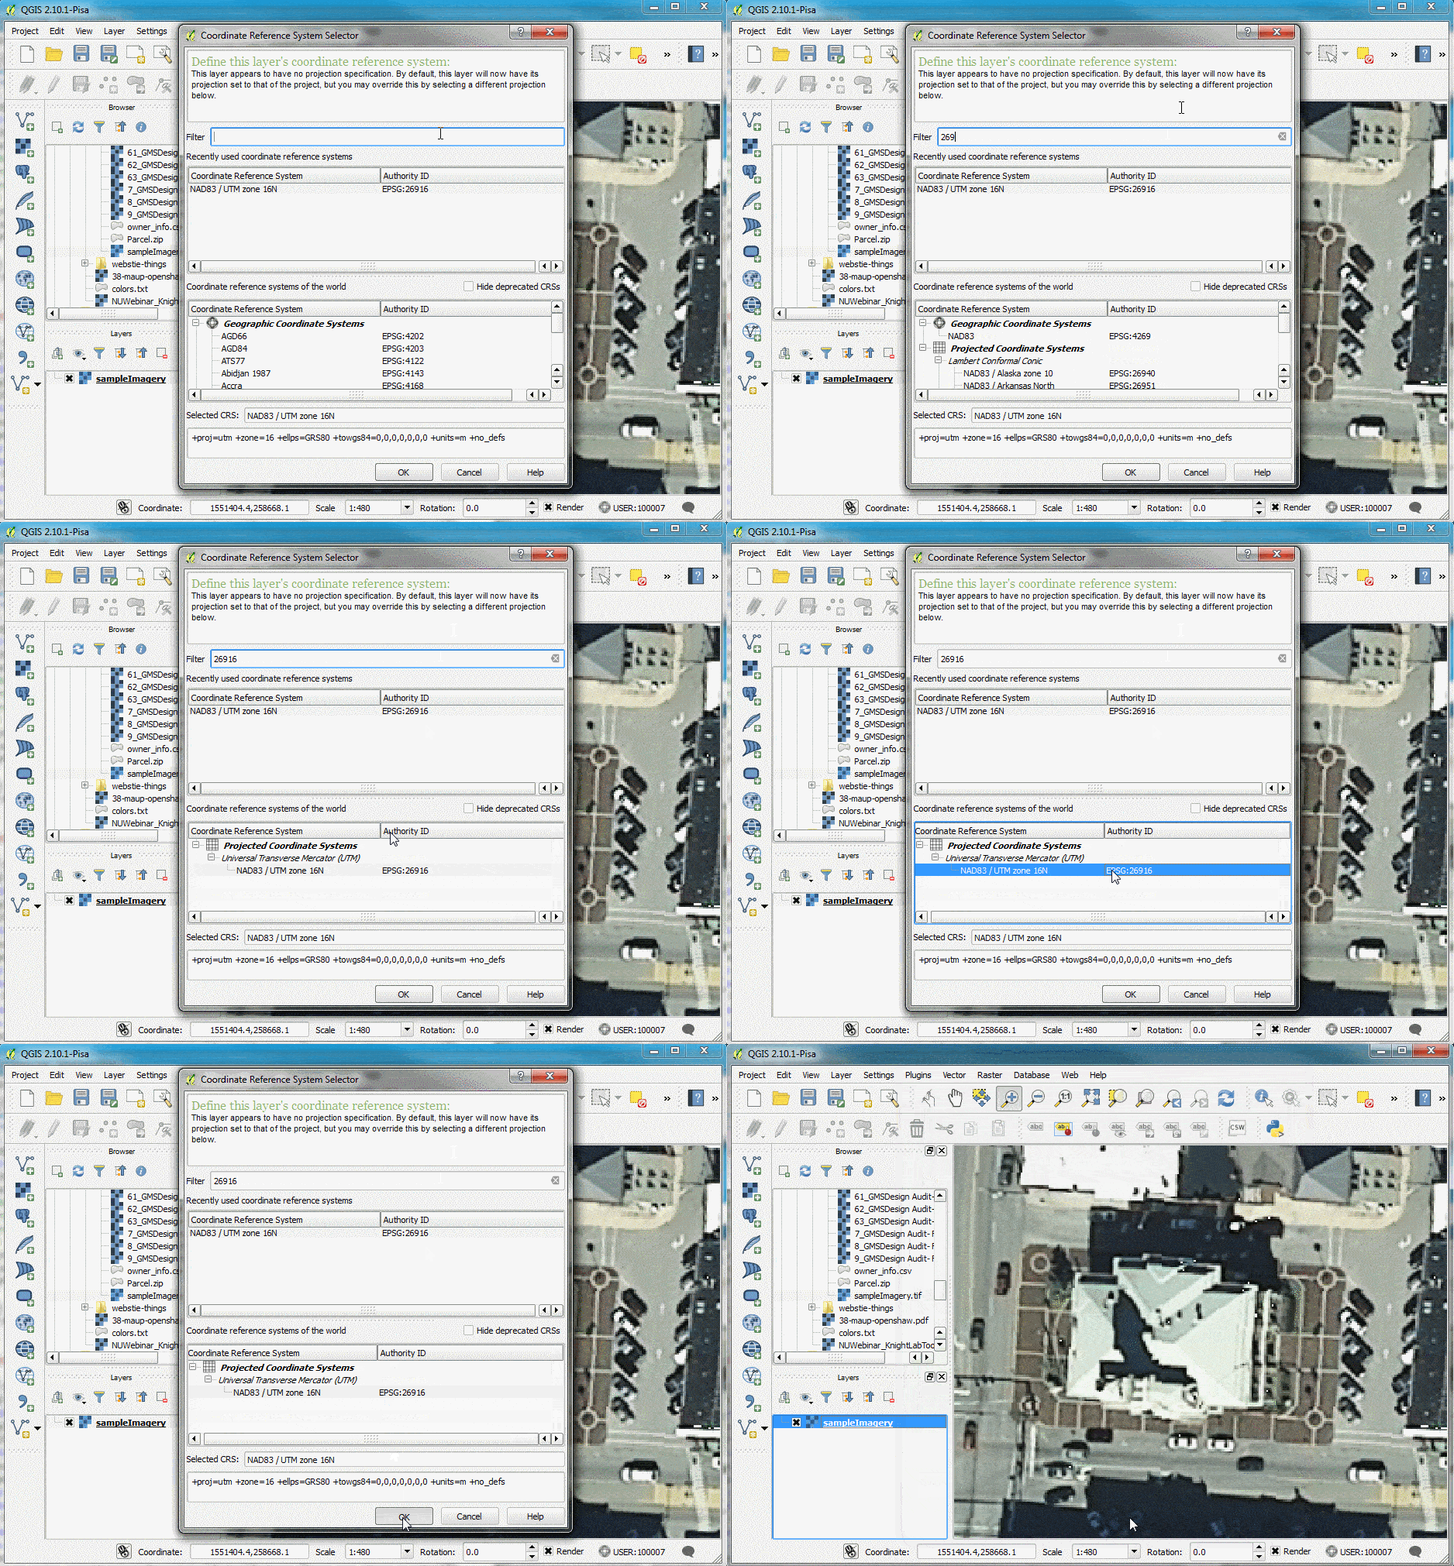
- Navigate to Project>Save as Image… and click.
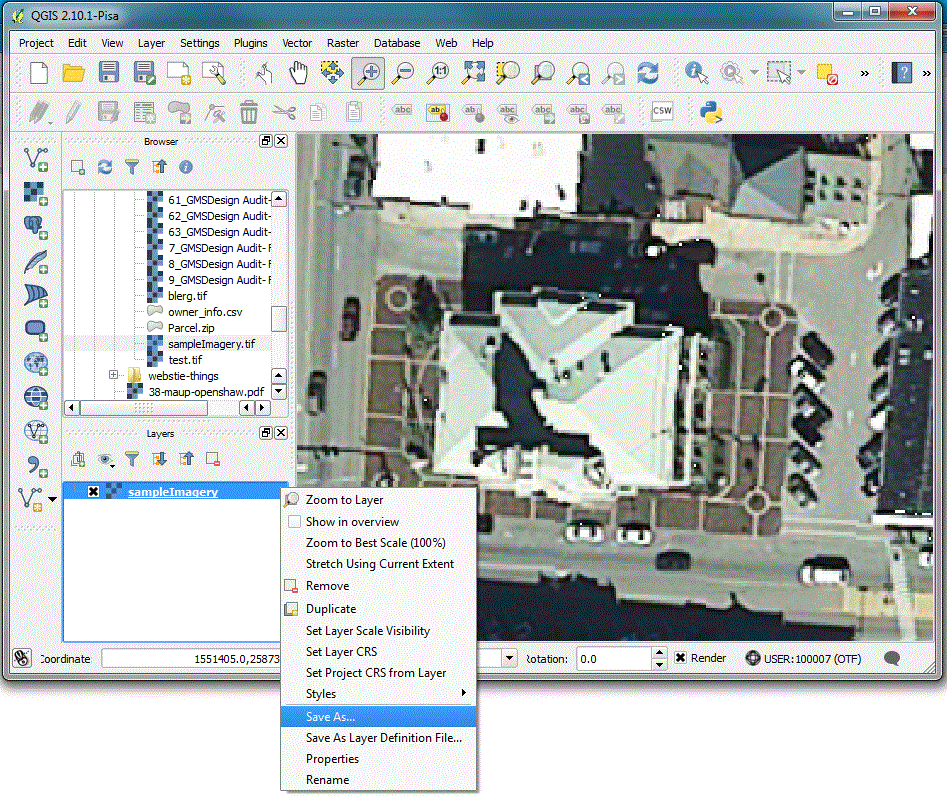
- Select the folder you want to save your imagery to and give it a name. Click Save. Voila! You’ve saved a subset of your imagery using QGIS.